TL;DR:
- Professional wedding lighting transforms venues by creating mood, highlighting features, and guiding guest engagement. Proper assessment, planning, and installation ensure a seamless, dynamic atmosphere that elevates the celebration. Partnering with experts guarantees flawless execution, maximizing emotional impact and guest enjoyment throughout your special day.
Picture this: you walk into a Scottish baronial hall just before your evening reception begins. The stone walls glow amber and rose gold from perfectly placed uplights. Centrepieces glitter under pin spots so precise they look like they’re lit from within. The dance floor pulses with colour, ready to shift in an instant from romantic warmth to full-on celebration energy. Lighting did that. Not flowers, not furniture, not even the grandeur of the architecture alone. If you’re planning a high-end wedding in Scotland and haven’t given your lighting setup the attention it deserves, this step-by-step guide will change that entirely.
Table of Contents
- Understand your venue and vision
- Essential lighting elements and requirements
- Step-by-step installation process
- Troubleshooting and avoiding common pitfalls
- Final checks for the perfect wedding glow
- Our perspective: why lighting truly defines your wedding’s energy
- Let experts deliver your dream wedding lighting
- Frequently asked questions
Key Takeaways
| Point | Details |
|---|---|
| Start with venue and vision | Understanding your space and desired atmosphere is the key to a successful lighting plan. |
| Gather the right tools | Prepare essential lighting types, accessories, and a checklist for smooth installation. |
| Follow a proven setup process | A step-by-step approach ensures effective and safe lighting arrangements. |
| Anticipate challenges | Know the common pitfalls and solutions to avoid last-minute surprises. |
| Check before guests arrive | Do final tests and adjustments to guarantee your wedding lighting wows everyone. |
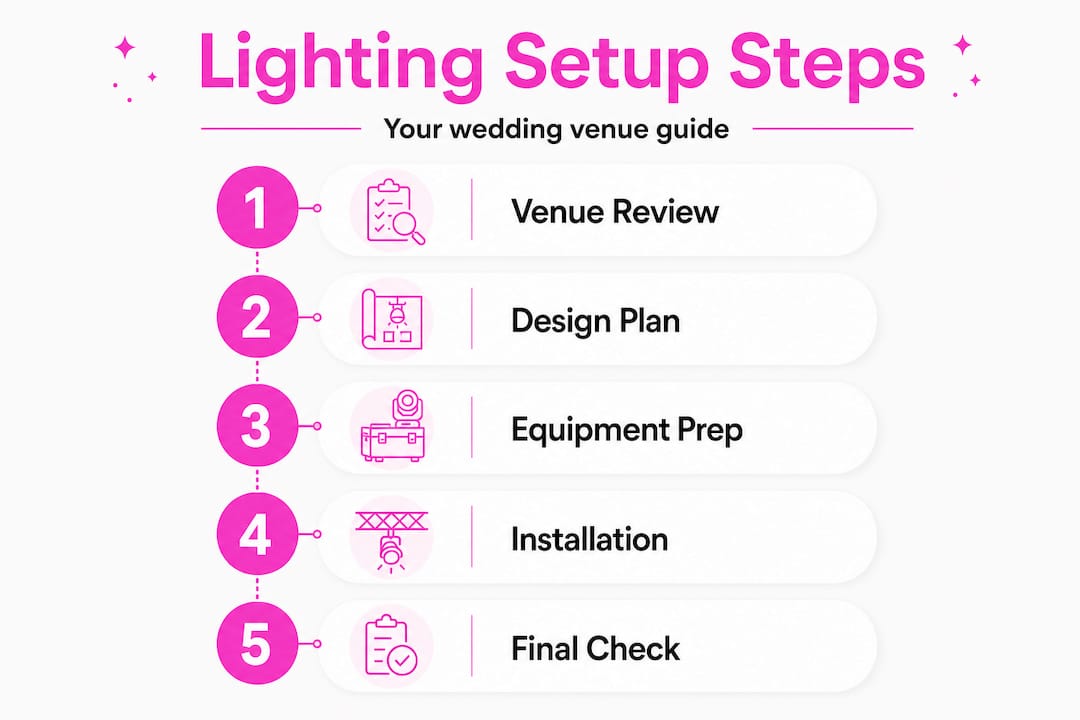
Understand your venue and vision
After understanding the impact lighting can have, the next step is to analyse what you’re working with and what you want to achieve. Every venue is different, and the best lighting plans begin with an honest, detailed assessment of the space before any equipment is ordered.
Start by walking the venue at different times of day. Natural light floods in at noon, but disappears entirely by 4pm in a Scottish winter. Note where existing fixtures are positioned, how high the ceilings are, and whether there are architectural features worth highlighting such as exposed stonework, vaulted ceilings, or grand staircases. These elements become your canvas.
Key questions to answer during your venue assessment:
- What is the total square footage of the main reception space?
- Where are the power outlets and distribution boards located?
- Are there restrictions on affixing anything to walls or ceilings?
- What is the ceiling height, and will that affect beam spread from uplights?
- Is there an outdoor area that needs lighting continuity?
As a practical benchmark, wedding lighting options experts recommend one uplight per 150 sq ft of wall space, so a 3,000 sq ft venue would require around 20 uplights. For table candles, 3 to 5 creates a pleasant glow, but 15 to 25 candles per table delivers the jaw-dropping wow factor you’re likely after at a premium event.
Once you’ve assessed the space practically, sit down with your partner and define your atmosphere in three words. “Romantic, warm, intimate” will lead you to entirely different choices than “dramatic, sleek, electric.” This vocabulary becomes a shorthand you and your lighting designer can use throughout the planning process.
Pro Tip: Bring fabric swatches or colour palette samples to the venue and test how different light temperatures interact with your wedding colours. A warm amber uplight can make ivory look stunning, but may make dusty blue florals appear muddy.
Essential lighting elements and requirements
With a clear vision in mind, you’ll need to gather all your lighting essentials before installation day. Understanding the different lighting types and their functions will help you communicate effectively with your supplier and avoid costly gaps in coverage.
Here is a breakdown of the main lighting types used at premium Scottish weddings:
| Lighting type | Primary purpose | Best used for |
|---|---|---|
| Uplighting | Wash venue walls with colour | Architectural features, mood setting |
| Pin spotting | Focused beam on a single object | Centrepieces, cake, floral arrangements |
| Fairy lights | Soft ambient glow | Ceilings, backdrops, outdoor spaces |
| Candles | Intimate warmth at table level | Guest tables, windowsills, mantelpieces |
| Gobo lights | Project patterns or monograms | Dance floors, feature walls |
| LED dance floor lighting | Dynamic colour shifts and effects | Dance floor energy and party atmosphere |
For spacing, uplights should be positioned every 8 to 12 feet around the perimeter of the room, and one pin spot per table is the standard starting point. These numbers ensure even coverage without creating harsh shadows or pools of darkness between fixtures.
Your accessories checklist matters just as much as the fixtures themselves. Many couples and even some less experienced suppliers overlook these practical items:
- Extension leads and power splitters rated for the total wattage of your rig
- Cable covers and ramps to eliminate trip hazards across guest walkways
- Gaffer tape for securing leads discreetly against skirting boards
- Spare bulbs and fuses for every fixture type in your setup
- Dimmers and lighting controllers compatible with your chosen fixtures
- Colour gels or RGBW LED packs for uplights if you want versatile colour changes
Creating atmospheric lighting effects that genuinely impress guests requires this level of preparation. Rushing the accessories list is where otherwise beautiful setups unravel on the day.
Pro Tip: Always request a full technical rider from your venue. This document lists power capacity, existing fixtures, and any restrictions. It will prevent awkward surprises when your team arrives to set up.
Step-by-step installation process
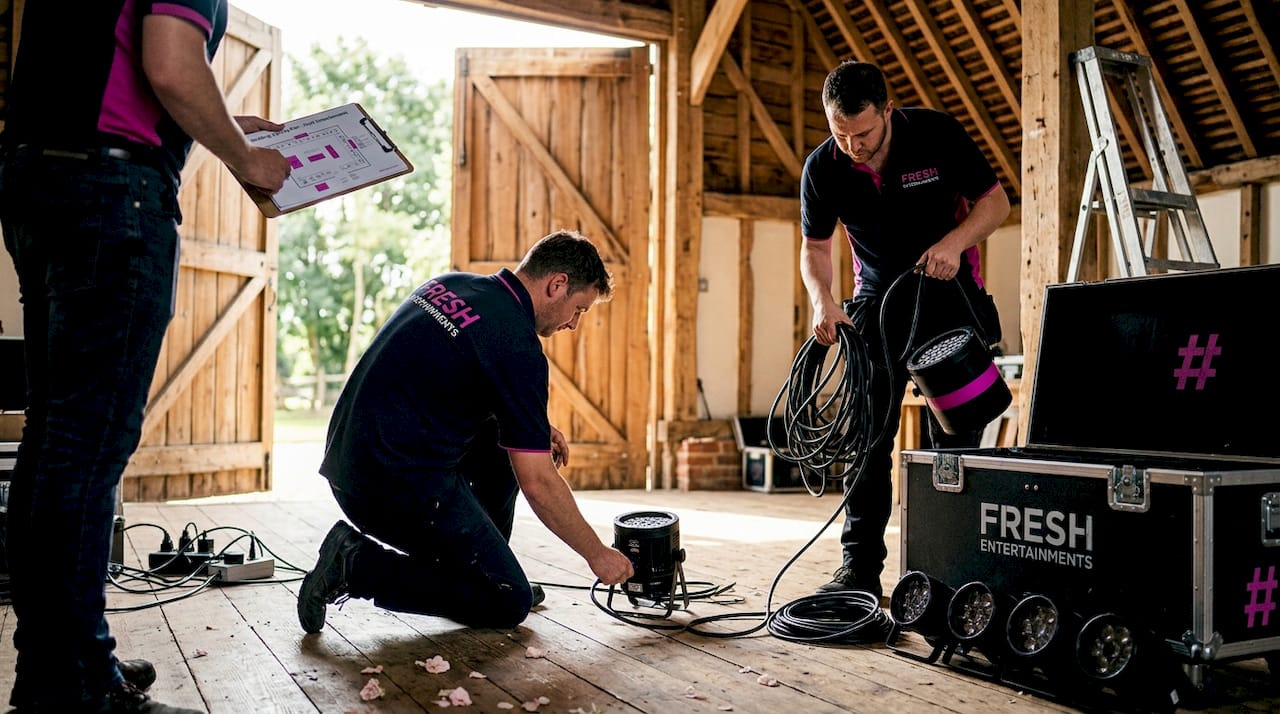
Once everything is ready, it’s time to follow a methodical setup process to bring your vision to life. Disorganised installation is the most common reason lighting doesn’t look as good in reality as it did in a mood board.
- Charge and test all equipment the day before. Never arrive at a venue with untested gear. Every uplight, pin spot, and controller should be switched on and confirmed working at your base or studio first.
- Lay out all equipment at the venue before installing anything. Group by type and location. This prevents doubling back across the room and interrupting other suppliers working in the same space.
- Install uplights first. Work around the room perimeter systematically. Position each unit, angle it correctly towards the wall or feature, and connect power before moving on. Do not adjust colour until all units are placed.
- Run and conceal all cabling. Feed cables along skirting boards, under carpets where possible, or use cable ramps across open walkways. Secure with gaffer tape at intervals of no more than one metre.
- Set pin spots over each guest table. Stand at the table and look up to confirm the beam is centred on the centrepiece. Minor adjustments at this stage save considerable frustration later.
- Connect to control systems and programme scenes. Input your colour values, intensity levels, and any timed transitions into your lighting controller. Label each scene clearly (ceremony, drinks reception, dinner, dancing).
- Final safety check before guests arrive. Walk every cable run, confirm all covers are in place, and verify that no fixtures are positioned where guests could knock or trip over them.
A standard lighting rig takes 60 to 90 minutes to install, while a complex multi-zone setup with gobos, moving heads, and tiered pin spotting can take up to 3 hours. Build this time into your venue access schedule accordingly.
“Treat your lighting installation like a technical rehearsal. Every element should be tested in context before the audience arrives. The same principle applies to your wedding.” This mindset, borrowed from professional event production, will save you from avoidable day-of disasters.
For larger setups, coordinating your lighting installation with your other entertainment suppliers is critical. A thorough entertainment coordination guide will help you sequence access times so the DJ, band, and lighting team aren’t competing for the same physical space simultaneously.
Troubleshooting and avoiding common pitfalls
After following your setup steps, it’s vital to be aware of issues that may arise and how to solve them quickly. Even expertly planned setups encounter problems. The difference is in how prepared you are to resolve them.
The most common problems and how to prevent them:
- Under-lighting large spaces. Remember, uplights every 8 to 12 feet is a minimum, not a maximum. Err on the side of more units in unusually tall or wide rooms.
- Power tripping due to overloaded circuits. Map your power draw in advance. LED uplights typically draw 10 to 20 watts each, but older tungsten pin spots can pull 75 watts. Calculate total load and spread across multiple circuits.
- Dark corners and forgotten zones. Walk the room as a guest would. Move from the entrance to the bar to the dance floor. Identify any zones where the lighting drops off dramatically and add fill lights.
- Trip hazards from poorly managed cables. Use brightly coloured gaffer tape in back-of-house areas and proper cable ramps everywhere guests walk. This is also a venue requirement in most cases.
- Fixture position conflicts with décor. Confirm final table and décor layouts with your planner before positioning pin spots. Centrepiece heights vary considerably and a pin spot aimed at a 30cm vase won’t work if the arrangement is actually 70cm tall.
“The most expensive lighting kit in the world won’t save you if the basics aren’t right. Power planning, cable management, and positional accuracy are what separate a professional result from an amateur one.”
Last-minute changes are inevitable at weddings. A table layout shifts, a floral arrangement arrives larger than expected, or the first dance location changes. Build adaptability into your plan by keeping two or three spare fixtures unpacked and accessible until the last moment. This allows you to react quickly without disrupting the rest of the setup.
If you’re aiming to deliver premium guest entertainment at the highest level, your lighting must work in harmony with every other element, not exist as a separate afterthought.
Final checks for the perfect wedding glow
The final touch is a thorough check to ensure everything is flawless for your celebration. Once all fixtures are installed and powered, do not assume the job is done. The final check phase is what truly separates good from exceptional.
- Test every circuit independently. Switch each zone off and on in isolation to confirm no unexpected crossover or shared load issues exist.
- Walk through with your partner and wedding planner. Fresh eyes catch things the installer misses. Ask them to stand at the entrance and give their first impression honestly.
- Observe in both daylight and darkness. Many Scottish venue setups look underwhelming in afternoon light but spectacular at night. Know when the transition happens and plan accordingly, particularly for winter weddings where darkness falls early.
- Test all programmed scene transitions. Advance through every lighting scene you’ve programmed from ceremony to dancing. Confirm the transitions are smooth, not sudden or jarring.
- Adjust intensity and colour balance with photography in mind. Speak to your photographer. Extremely saturated uplighting (deep red or pure blue) can create unwanted colour casts on skin tones in photographs. Warm amber, soft pink, and blush tones are universally flattering.
A statistic worth remembering: 16 uplights is the minimum recommended for venues under 5,000 sq ft to achieve a professional look. If your count falls below that number, redistribution or adding units before guests arrive is strongly advisable.
Confirm your backup plan too. Have at least one spare controller, a handful of spare leads, and the contact number of your lighting supplier saved and accessible. Problems resolved in 10 minutes feel entirely different from problems that drag on through the first hour of your reception.
Finally, check your lighting options are correctly matched to your venue’s specific ambience goals. A stunning Highland castle requires different treatment to a contemporary Glasgow event space, and getting that match right is what creates the “this was made for us” feeling your guests will remember.
Our perspective: why lighting truly defines your wedding’s energy
Stepping back from the technical details, there’s something that years of working on premium Scottish weddings has made us believe firmly: lighting is not a decorative add-on. It is the architecture of emotion at your event.
Most couples budget generously for flowers, catering, and photography. Lighting, by contrast, is often treated as a line item to trim. This is a mistake we see repeatedly, and it’s one that couples notice only once the day arrives and something feels slightly flat, slightly ordinary, despite everything else being perfect.
Here’s what most lighting articles won’t tell you: the real power of expert lighting is not what it does to the room, it’s what it does to your guests. Well-designed lighting subconsciously guides guest engagement at weddings through the evening. Brighter, cooler tones during the drinks reception encourage conversation and movement. Warm, lower-intensity lighting during dinner creates intimacy at the table. Then, as the evening builds, dynamic colour shifts and increased intensity signal to every guest, wordlessly, that it’s time to celebrate.
This sequencing is something amateur setups almost never achieve. It requires both technical skill and an understanding of event flow. The difference it makes is not subtle. Guests at professionally lit weddings stay later, dance harder, and talk about the atmosphere for years afterwards.
The uncomfortable truth is that no amount of DIY effort fully replicates what an experienced professional delivers, not because the equipment is beyond reach, but because the instinct for how light shapes human behaviour takes time and real-world events to develop.
Let experts deliver your dream wedding lighting
If you want an unforgettable celebration without the stress, partnering with a lighting professional can make all the difference. At Fresh Entertainments, we bring every element of this guide to life for you, from initial venue assessment through to flawless on-the-night execution.
Our team works with Scotland’s finest venues, designing bespoke lighting rigs that transform spaces and create those genuinely jaw-dropping first impressions your guests will talk about long after the evening ends. Explore our wedding lighting experts service to see what’s possible for your venue, or browse our wedding party atmosphere inspiration for real examples of what a professional setup delivers. When you’re ready to discuss your day in detail, our entertainment packages bring lighting, sound, and performance together into a single, seamlessly managed experience built entirely around you.
Frequently asked questions
How many uplights do I need for my wedding venue?
As a practical rule, aim for one uplight per 150 sq ft of wall space, or a minimum of 16 uplights for venues under 5,000 sq ft to achieve a polished, professional look.
How long does a full lighting setup usually take?
A standard rig takes 60 to 90 minutes to install, but a more complex design incorporating multiple zones, gobos, and moving fixtures can take up to 3 hours, so always factor this into your venue access window.
What lighting types work best for table décor?
Pin spots and candle groupings are the most effective combination: one pin spot per table for precision highlighting and 15 to 25 candles per table if you want a truly luxurious, glowing atmosphere.
Can lighting be adjusted for the evening party?
Yes, most professional setups use programmable controllers and dimmers so you can shift seamlessly from the soft warmth of dinner to the vibrant energy of the dance floor with ease, without anyone needing to manually reposition a single fixture.
What’s the biggest lighting mistake couples make?
The most common error is under-lighting key areas while overlooking power and safety planning, which results in dark corners, tripped circuits, and a noticeably flat atmosphere that even the best music can’t fully compensate for.